

Commodore PET games can only use text characters for player and enemy graphics, and sound is limited to non-existent, but that does not mean we can’t make a fun game.
In this part 2 of the Programming the Commodore PET series, let’s use XC-BASIC to create the foundation for a simple, single-screen shoot ’em up game in the classic early arcade style.

Single Screen Shooter Video Games
Back in the earliest days of video games, single-screen shooting games were almost the default. Think Spacewar, Space Invaders, Galaxian, Centipede, Gorf, Galaga, Missile Command, Asteroids, and so on. Galaga in particular is still one of my favourites.
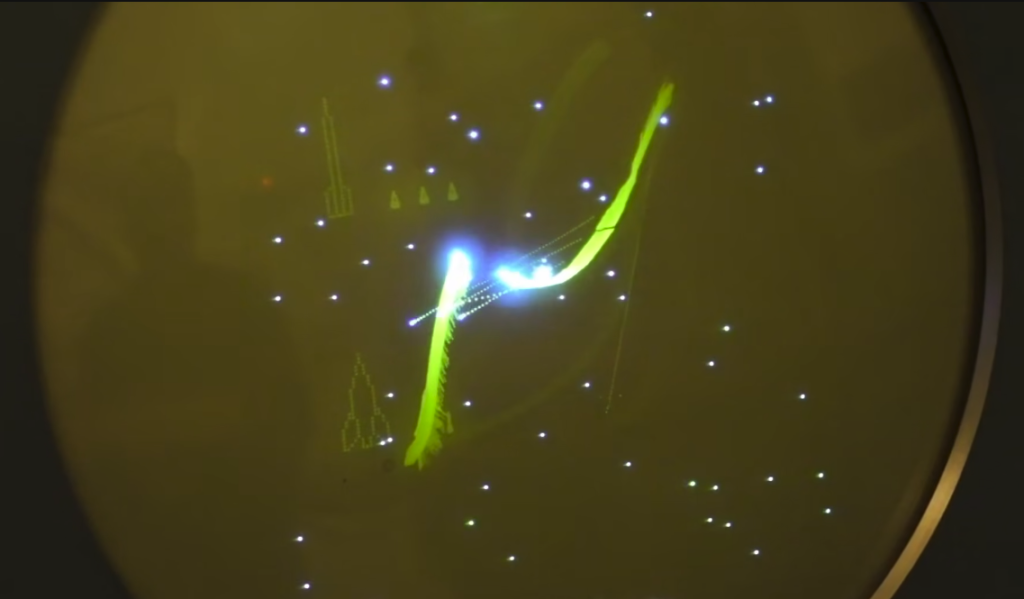
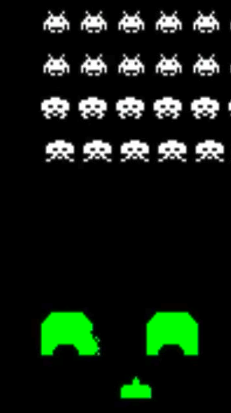
Creating a single-screen shooter will allow us to cover a lot of the main elements that go into any kind of real time action video game:
- Game loops.
- Player control.
- Collision detection.
- Animation.
Plus, of course, a shooter needs the ability to shoot and destroy things!

You can now follow the tutorials and edit the code right in your web browser with the Online Retro IDE
– No downloads, configuration, etc necessary, and it is free!
XC-BASIC
Rather than using Commodore interpreted BASIC, this is a good opportunity to come back to the compiled XC-BASIC and the speed boost that offers us. A nice side benefit of using this language and toolchain is we can more easily port our game to the rest of the Commodore family afterwards too.
The implementation for the PET lacks some handy features available for the C64 and Vic 20 versions, but we can get around those with POKE and other tricks.
Which PET?
Unlike the C64, there are a lot of different models to target, each with subtle to significant differences, so I will be targeting the Mini PET which is a recreation of the 4032. 40 stands for 40 columns (versus 80 columns), 32 is how many KB memory it has.
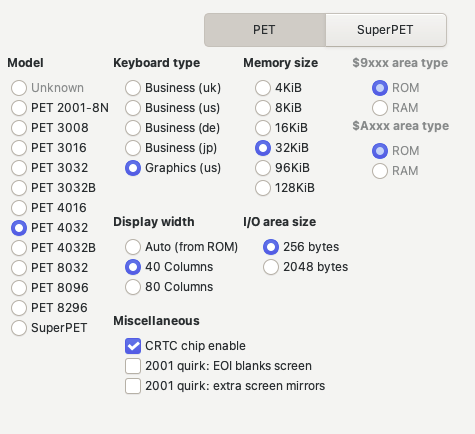
On the PET there are two character sets that the user might be using, the PETSCII and upper case version and the upper/lowercase version. To give us maximum flexibility in “graphics” I suggest we go with the full PETSCII experience.
Drawing to the Screen
If you have followed my C64 programming tutorials, you will be familiar with the idea of using POKE to write directly to screen memory. This allows us to update the graphics quickly and precisely, at the expense of a bit of math. Screen memory starts at 32768 and as we selected a 40 column model, we can then take the X and Y coordinates and offset from that starting point like so:
POKE SCREEN_RAM+(40*Y)+X,65
XC-BASIC Variables
In XC the variable type is very important, though it can infer the type if you are careful how the variable is initialised. Check out the code below where we set up our main values:
DIM X AS INT
DIM Y AS INT
DIM OLDX AS INT
DIM OLDY AS INT
DIM BX AS INT
DIM BY AS INT
DIM BF AS INT
X=10
Y=10
K$=""
GAME_OVER = 0
You can see I was lazy and set most things to be integers – in XC-BASIC these are signed (can be positive or negative) values between -32,768 to 32,76. Our variableK$ , though, is set to a string just by giving it an empty string literal value of "".
Why did I not set X and Y that way? Well how would the compiler correctly know what data type to use? Setting the value as 10 could mean a byte, which would limit us to a maximum value of 255. This might be fine if the variables are only ever used for 40 column screen coordinates, but might mess up calculations when reused or as part of more complex mathematical calculations.
Game Loops
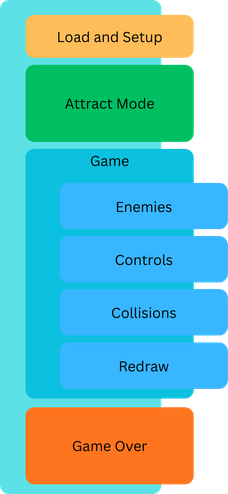
Video games tend to stick to a standard structure of nested loops, with the core loop being “is the player still alive”, so at the very least we need to repeatedly check for that:
DO WHILE GAME_OVER <> 1
Of course that could be alternatively written as “while lives > 0” just as easily, but for simplicity I wanted to have it as an on/off switch so we could have easily understandable code that allows the player to quit using the Q key.
For now we will not worry about showing any kind of titles/help screens, or any “game over” or high scores states, but that still leaves us with:
- Reading the keyboard and moving the player.
- Detecting and dealing with collisions.
- Redrawing the screen.
Rather than redraw the whole screen, for now we can simply tidy up after the player and their bullet as part of drawing those specific things, as we do not have a screen yet to draw.
Keyboard Control and Player Movement
As in Commodore BASIC, XC-BASIC allows us to GET keyboard input. While not the best for action games, as it only allows us to detect a single keypress at once, it does at least allow us to not pause to wait for the player to press a key as in “turn-based” games.
We can simply check the string returned to see if specific keys were pressed and take appropriate action.
If the new coordinates are different from the old coordinates we delete where the player was with a space and place the player in the new location before looping back and checking again.
  OLDX=X
  OLDY=Y

  GET K$
  IF K$="Q" OR K$="q" THEN GAME_OVER = 1
  IF K$="D" OR K$="d" THEN X=X+1
  IF K$="A" OR K$="a" THEN X=X-1
  IF K$="W" OR K$="w" THEN Y=Y-1
  IF K$="S" OR K$="s" THEN Y=Y+1
  IF K$=" " THEN
  	BX=X
	BY=Y-1
  	BF=1
  END IF

  IF OLDX<>X OR OLDY<>Y THEN
  	POKE 32768+(40*OLDY)+OLDX,32
  	POKE 32768+(40*Y)+X,65
  END IF
Basic Collision Detection
In the most raw form, detecting collisions is simply about checking if two game objects are trying to occupy the same space.
Another aspect we can also employ is “bounds checks”, where we keep the player within a set playable area by checking the upper and lower limits of their coordinates. For example, we want to keep the player on screen so will not allow their X and Y coordinates to drop below 0.
Right now we are simply drawing to the screen memory, we do not have any other game objects as such, but we can still prevent the player from bumping into anything that is there:
 IF PEEK(32768+(40*Y)+X)<>32 THEN
  	X=OLDX
  	Y=OLDY
  END IF
This says “if the new player coordinates do not contain empty space, reset the coordinates back to the original values”.
Firing Bullets
For the player to be able to shoot, we need to know some things:
- Where the player’s bullet/laser/rocket/fireball is.
- Is it active.
- What direction it needs to move.
- Did it hit anything?
If the bullet is firing (BF=1) we need to keep the bullet moving. For now we consider the bullet only able to fire upwards, ala Space Invaders and Galaga, simplifying things greatly. While the bullet is firing and has not hit anything we need to delete where it was and draw its new location.
  IF BF=1 THEN
  	POKE 32768+(40*BY)+BX,32

        IF BY >= 0 THEN
        	BY=BY-1
  	ELSE
        	BF=0
        END IF

	IF PEEK(32768+(40*BY)+BX)<>32 THEN
        	POKE 32768+(40*BY)+BX,32
        	BF=0
	ELSE
	  	POKE 32768+(40*BY)+BX,34
        END IF
  END IF
What happens if it does hit something? Well for now we can simply delete that character cell with a space (32) and turn the bullet off.
Full Code (so far)
Feel free to grab the code from my Github repo or edit and play with it right in your web browser within the retro programming IDE.
DIM X AS INT
DIM Y AS INT
DIM OLDX AS INT
DIM OLDY AS INT
DIM BX AS INT
DIM BY AS INT
DIM BF AS INT
X=10
Y=10
K$=""
GAME_OVER = 0
POKE 32768+(40*Y)+X,65
DO WHILE GAME_OVER <> 1

  OLDX=X
  OLDY=Y

  GET K$
  IF K$="Q" OR K$="q" THEN GAME_OVER = 1
  IF K$="D" OR K$="d" THEN X=X+1
  IF K$="A" OR K$="a" THEN X=X-1
  IF K$="W" OR K$="w" THEN Y=Y-1
  IF K$="S" OR K$="s" THEN Y=Y+1
  IF K$=" " THEN
  	BX=X
	BY=Y-1
  	BF=1
  END IF

  IF PEEK(32768+(40*Y)+X)<>32 THEN
  	X=OLDX
  	Y=OLDY
  END IF


  IF OLDX<>X OR OLDY<>Y THEN
  	POKE 32768+(40*OLDY)+OLDX,32
  	POKE 32768+(40*Y)+X,65
  END IF

  IF BF=1 THEN
  	POKE 32768+(40*BY)+BX,32

        IF BY >= 0 THEN
        	BY=BY-1
  	ELSE
        	BF=0
        END IF

	IF PEEK(32768+(40*BY)+BX)<>32 THEN
        	POKE 32768+(40*BY)+BX,32
        	BF=0
	ELSE
	  	POKE 32768+(40*BY)+BX,34
        END IF
  END IF
LOOP
What Next?
While we have quite a lot of foundational elements, we do not quite have a game yet because we have no enemies to avoid, or even any way for the player to score points. We will add those elements in the next part of the series.
 Getting the Most Out of Your R36S