

Ever wondered how emulators work? And what is the difference between an emulator, a simulator, an interpreter, and a virtual machine?
As you might have gathered from my ever-growing collection of online emulators, I love emulation. Weirdly that seems to be a controversial thing to say in the retro community, but I stand by it.
There is a lot of work and at times some genius coding that goes into creating the more advanced emulators, especially those that aim for complete hardware and “cycle accuracy”, but at their foundation they all operate on similar principles.
Let’s dig in to what exactly emulators are and how they work right now …

Definition of “Emulator” Vs Simulator, Interpreter
These words get used casually to mean the same or similar things, but being strict about it we can see that they are quite different and that matters when it comes to actually coding something. Let’s use the example of the video game Space Invaders to help clarify things:
- Emulation is where the workings of the machine are closely recreated when executing software written for it so that the behaviour of the output matches the original. A Space Invaders emulator would recreate the graphic, sound, and processor hardware, and load the original ROMs. Taken to the extreme you get a virtual machine.
- Simulation is different in that the goal is to replicate the outcome behaviour, but not exactly match the processes that go into that outcome. In the Space Invaders example it would be like writing a game closely inspired by or replicating the look and feel of the arcade game but without referencing the original graphic or game source code.
- Interpreters take the opposite approach and focus on executing the original source code, but without attempting to recreate how the original hardware work, or even the look and feel necessarily. Think of the Microsoft BASIC interpreter that was popular across all major home computers of the 1970s and 1980s, the aim was for a BASIC program to execute, not Microsoft BASIC running on a Z80 with a green-screen monochrome monitor running at 1mhz. In the Space Invaders example, the interpreter would take the Intel 8080 machine code and follow the instructions. When those instructions were, say display logic, it would use the features of the emulators host environment and the programmers chosen platform (Eg. JavaScript in a web browser) to render those graphics and achieve the result.
Introducing CHIP8
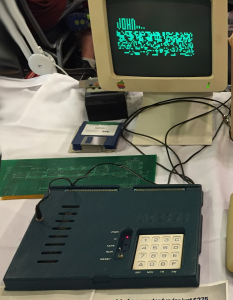
Now we know the differences, we can introduce the example project which is the creation of a CHIP8 interpreter.
Why an interpreter?
CHIP8 is generally considered a great introduction to writing emulators, even though as mentioned it is strictly an interpreter because we will be reading and executing compiled CHIP8 programs, not trying to replicate the imaginary hardware of a CHIP8 machine.
We could expand to be a true emulator if you wanted that additional challenge – CHIP8 was originally used on the COSMAC VIP and Telmac 1800, which were 8-bit computers from the mid-1970s. That said, the idea of CHIP8 was mostly to make creating and porting games easier for these systems.
CHIP8Ish
You can find my public repo for my CHIP8 emulator solution written in C over at Github. Right now it is just enough to read a few of the .CH8 demo programs from the test suite into memory and execute them.
For example, all my first test program does is render a sprite of a little man on the display.


Lots has already been written about developing solutions for this particular coding challenge, and the benefit is in doing it yourself rather than reading about how someone else did it, but I will give you some clues without spoiling anything too much.
Firstly, I developed my interpreter using the following useful reference docs:
- https://en.wikipedia.org/wiki/CHIP-8
- http://devernay.free.fr/hacks/chip8/C8TECH10.HTM
- https://www.cs.columbia.edu/~sedwards/classes/2016/4840-spring/designs/Chip8.pdf
- https://johnearnest.github.io/Octo/docs/chip8ref.pdf
Right now I am using https://johnearnest.github.io/Octo/ to compile and decompile CHIP8 programs, though I might make my own assembler which would be another interesting challenge.
How it Works
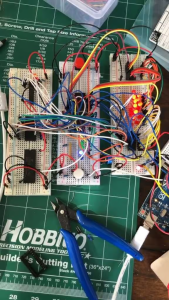
My program has two modes, set on the command line using arguments. These modes are “auto” and “single stepping”, inspired by my breadboard computer project. This means the code can execute start to finish or I can examine each instruction one at a time.
The latter mode is essential to see if everything is working as it should in detail. I am intentionally slowing down operation so I can see changes at every stage.
Loading the program involves reading each byte into the emulated computer’s 4kb of RAM in the correct place.
Each CHIP-8 instruction is exactly 2 bytes long, and programs should be loaded into memory starting at address 0x200, so after loading that is where we need to set our Program Counter (PC) to start.
Only two instructions require the screen to be updated, the clear screen instruction and drawing a sprite so we set a flag on those to instruct the display to refresh. For my “display” I print the contents of my virtual screen ram in binary representation to the console, with a filled block for 1 and a black block for 0.
sprites, which are 8 pixels wide and may be from 1 to 15 pixels in height. Sprite pixels are XOR’d with corresponding screen pixels. In other words, sprite pixels that are set flip the color of the corresponding screen pixel, while unset sprite pixels do nothing.
Hex and Binary
The main loop keeps reading the next instruction from “RAM”, combining two bytes into a sixteen-bit value.
CHIP-8 has 35 opcodes, which are all two bytes long and stored big-endian.
Our instructions being “Big-Endian” means the first byte takes up the left 8 bits, then the second byte is put into the right-hand bits. We do this by shifting the first byte left:
// Now we need to combine the two bytes into a 16-bit big endian
        combined_instruction = (current_byte << 8 | next_byte);
Shifting means “move the bits”, and you can move them to the left, which increases their value by the power of 2, or move them to the right, decreasing their value. For example 0001 shifted left, making it 0010 increases the value from 1 to 2.
This is one of the cool but tricky things about tackling such a low-level project, it forces you to deal with things like bit manipulation that you might not commonly come across day to day.
When it comes to interpreting the instructions, we use the hex numbering system because it makes it easier for us humans to think in terms of the “chunks” we are working with:
    switch (opcode) {

    case 0x0000:

        switch(rNibble) {

        // 0x00E0
        // Clear the screen
        case 0x0000:
            clear_screen();
            break;

        // 0x00EE
        // Return from subroutine
        case 0x000E:
            break;
        }
Anyone who has done some HTML will likely be familiar with hex as that is how we generally represent colours. For example, #0000FF would be blue because red is 0, green is 0, and blue is to the max (255 in decimal, FF in hex, and 11111111 in binary).
In Hex, numbers go from 0-F, instead of 0-9, which means values from 0-255 can be represented using two hex characters, each character representing 4 bits, or a nibble (occasionally spelled nybble) each.
Funnily enough, the Chip 8 has a hex-based keypad for input and is still represented for controlling CHIP8 games.
As you can see above, first we have a big switch statement, which you can think of as a fancy IF.
There are ~35 “opcodes” (commands) in total, depending on which spec you are following. Some start with the same number, so we have to further filter down, as in the above example where 0x00E0 does something different to 0x00EE .
In fact a lot of my debugging has come down to which parts of the instruction we are using at any given time, so I made these variables:
    opcode = instruction & 0xF000;
    rNibble = instruction & 0x000F;
    reg = (instruction & 0x0F00) >> 8;
    reg2 = (instruction & 0x00F0) >> 4;
    data = instruction & 0x0FFF;
    low_byte = instruction & 0x00FF;
For any instruction we do not yet handle, I output the details so I can add it in, for example:
SINGLE STEP TEST
PC:2 Unhandled Instruction: Op:9000 Reg:0 rNibble:90 Data:90
Looking at the reference it seems 0x9000 is a register comparison 9xy0 - SNE Vx, Vy:
    // Compare VX and VY
    // if VX != VY, skip next instruction
     case 0x9000:
        if(V[reg] != V[reg2]) {
            PC += 2;
        }
        if(debug) printf("SNE V%X, V%X\n", reg, reg2);
        break;
Next Step?
I’m quite happy that a lot of tests actually run on my little program, but I would like to get it to the point where 64×32 games with the original set of opcodes run, no extensions. Not sure if I will bother with sound, though!
 Printing PETSCII Faster